Once your LinkedIn account is connected and your leads are ready, you can create your first campaign in SendCopy. This guide walks you through the campaign setup process, from selecting a sender and lead list to building your outreach sequence and launching the campaign.
Make sure you have:
A connected LinkedIn sender account.
A lead list ready to use.
Your outreach messages or sequence prepared.
Your sender limits and schedule reviewed.
A clear understanding of the audience you want to reach.
Open Campaigns from the main navigation.
Click Create Campaign.
Enter a name for your campaign.
Click Create to start setting up the campaign.
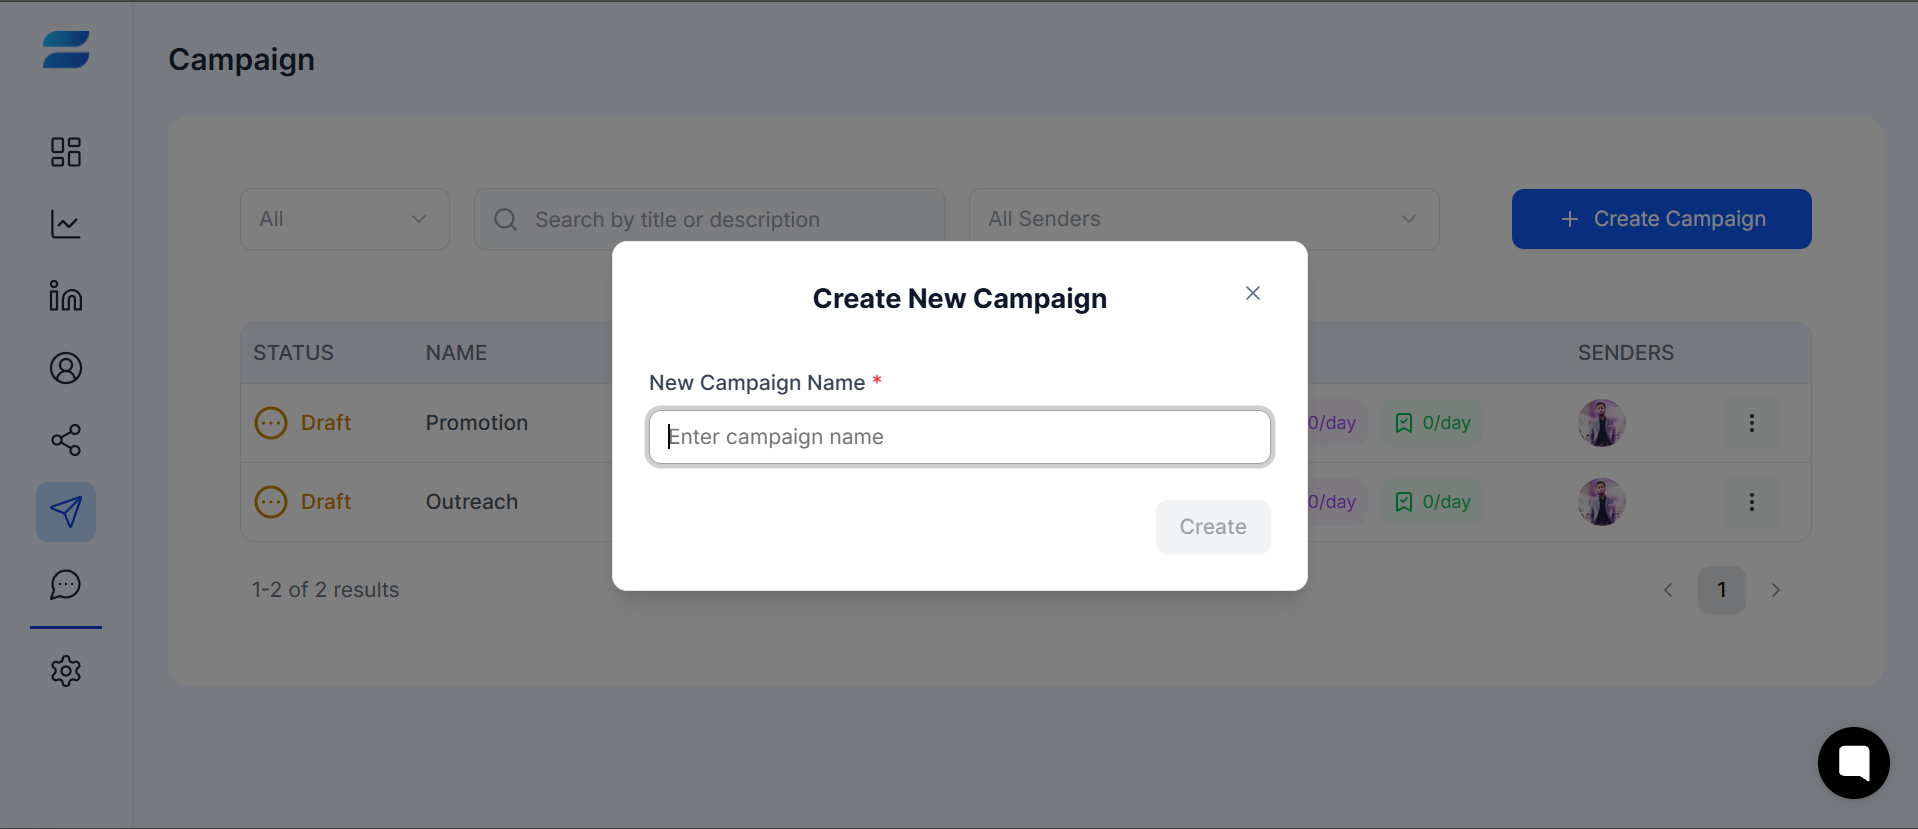
You'll then be taken to the campaign setup screen, where you'll complete four steps:
LinkedIn Senders → List of Leads → Sequence → Review & Launch
The first step is to choose the LinkedIn account that will run the campaign.
Select the LinkedIn sender you want to use.
Review the sender's current subscription and campaign activity.
Check the sender's limits before continuing.
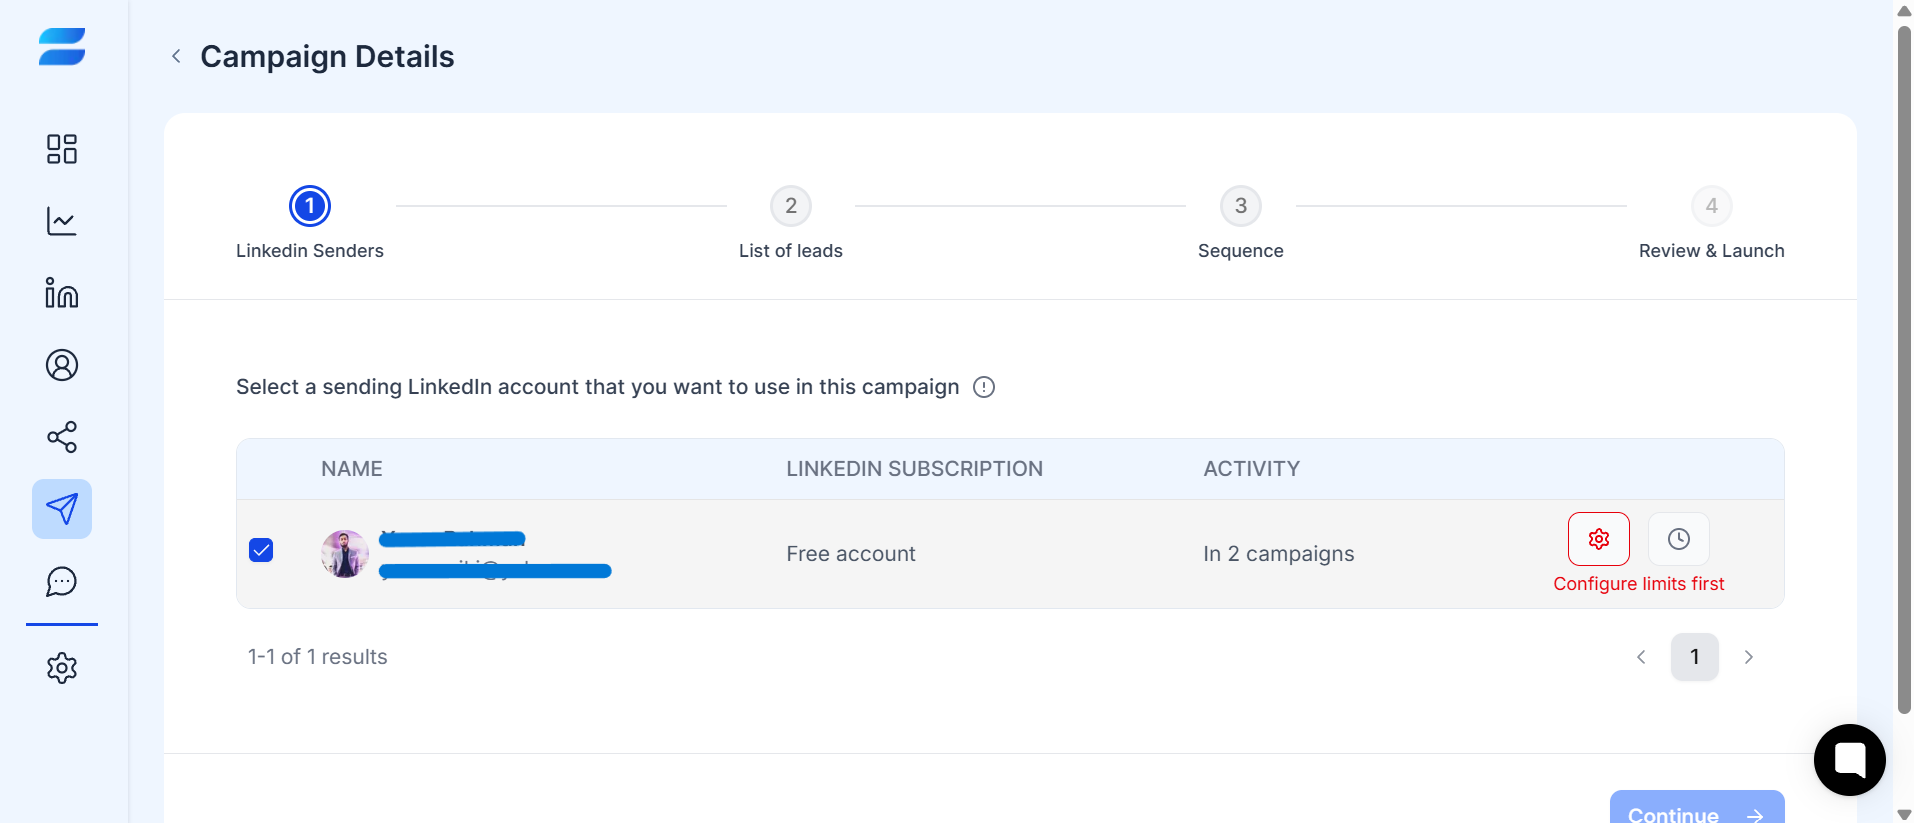
From this step, you can also configure your sender settings.
Open Configure Limits to review or adjust the limits available for the sender, including:
Max follows per day
Max messages per day
Max InMail messages per day
Max connection requests per day
Max profile views per day
Max post likes per day
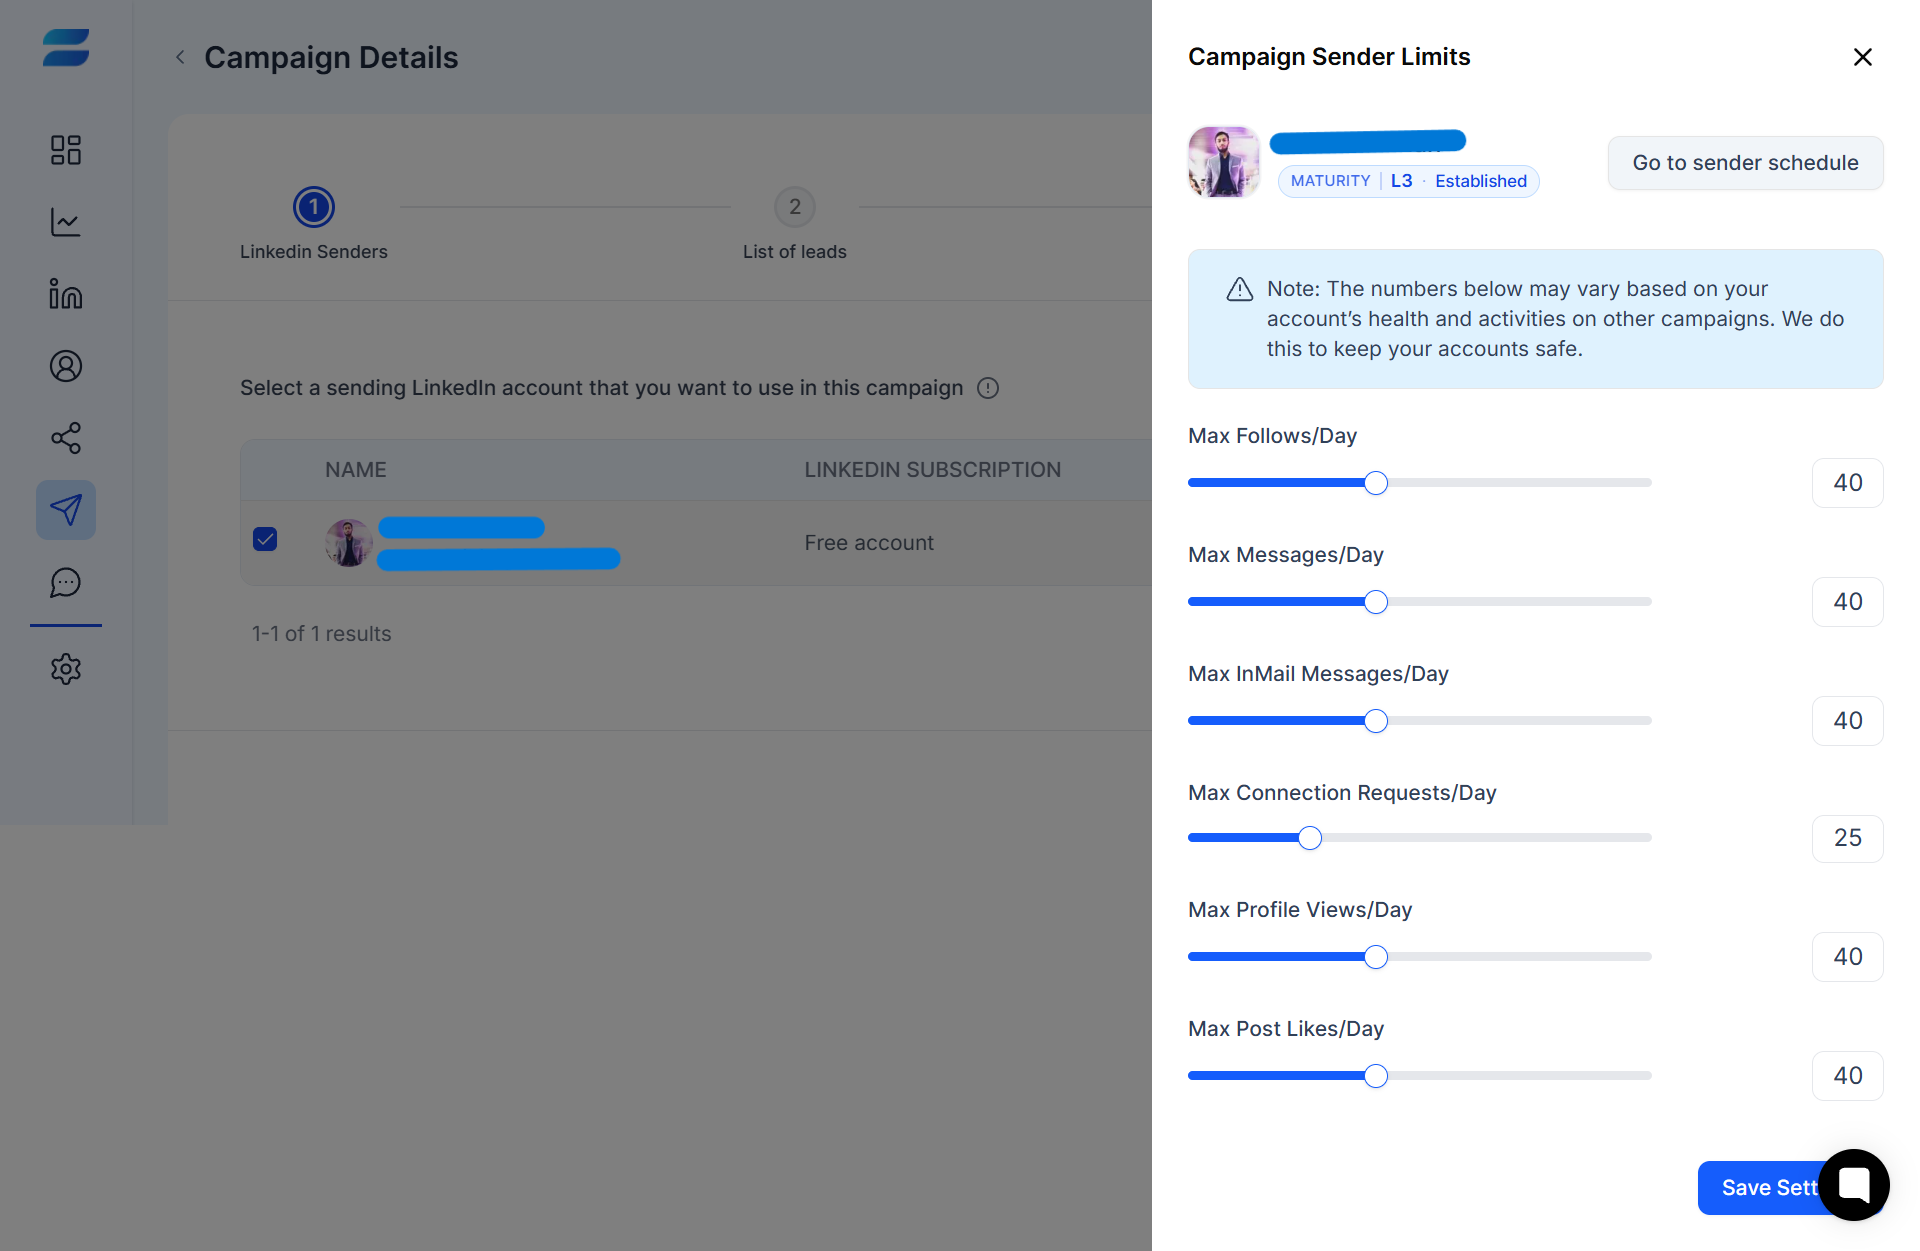
Review these settings before launching your campaign and make sure they match the activity you intend to run.
You can also open the sender's schedule to review when campaign activity will run.
Check the schedule for each day of the week and make sure the active hours are appropriate for your campaign.
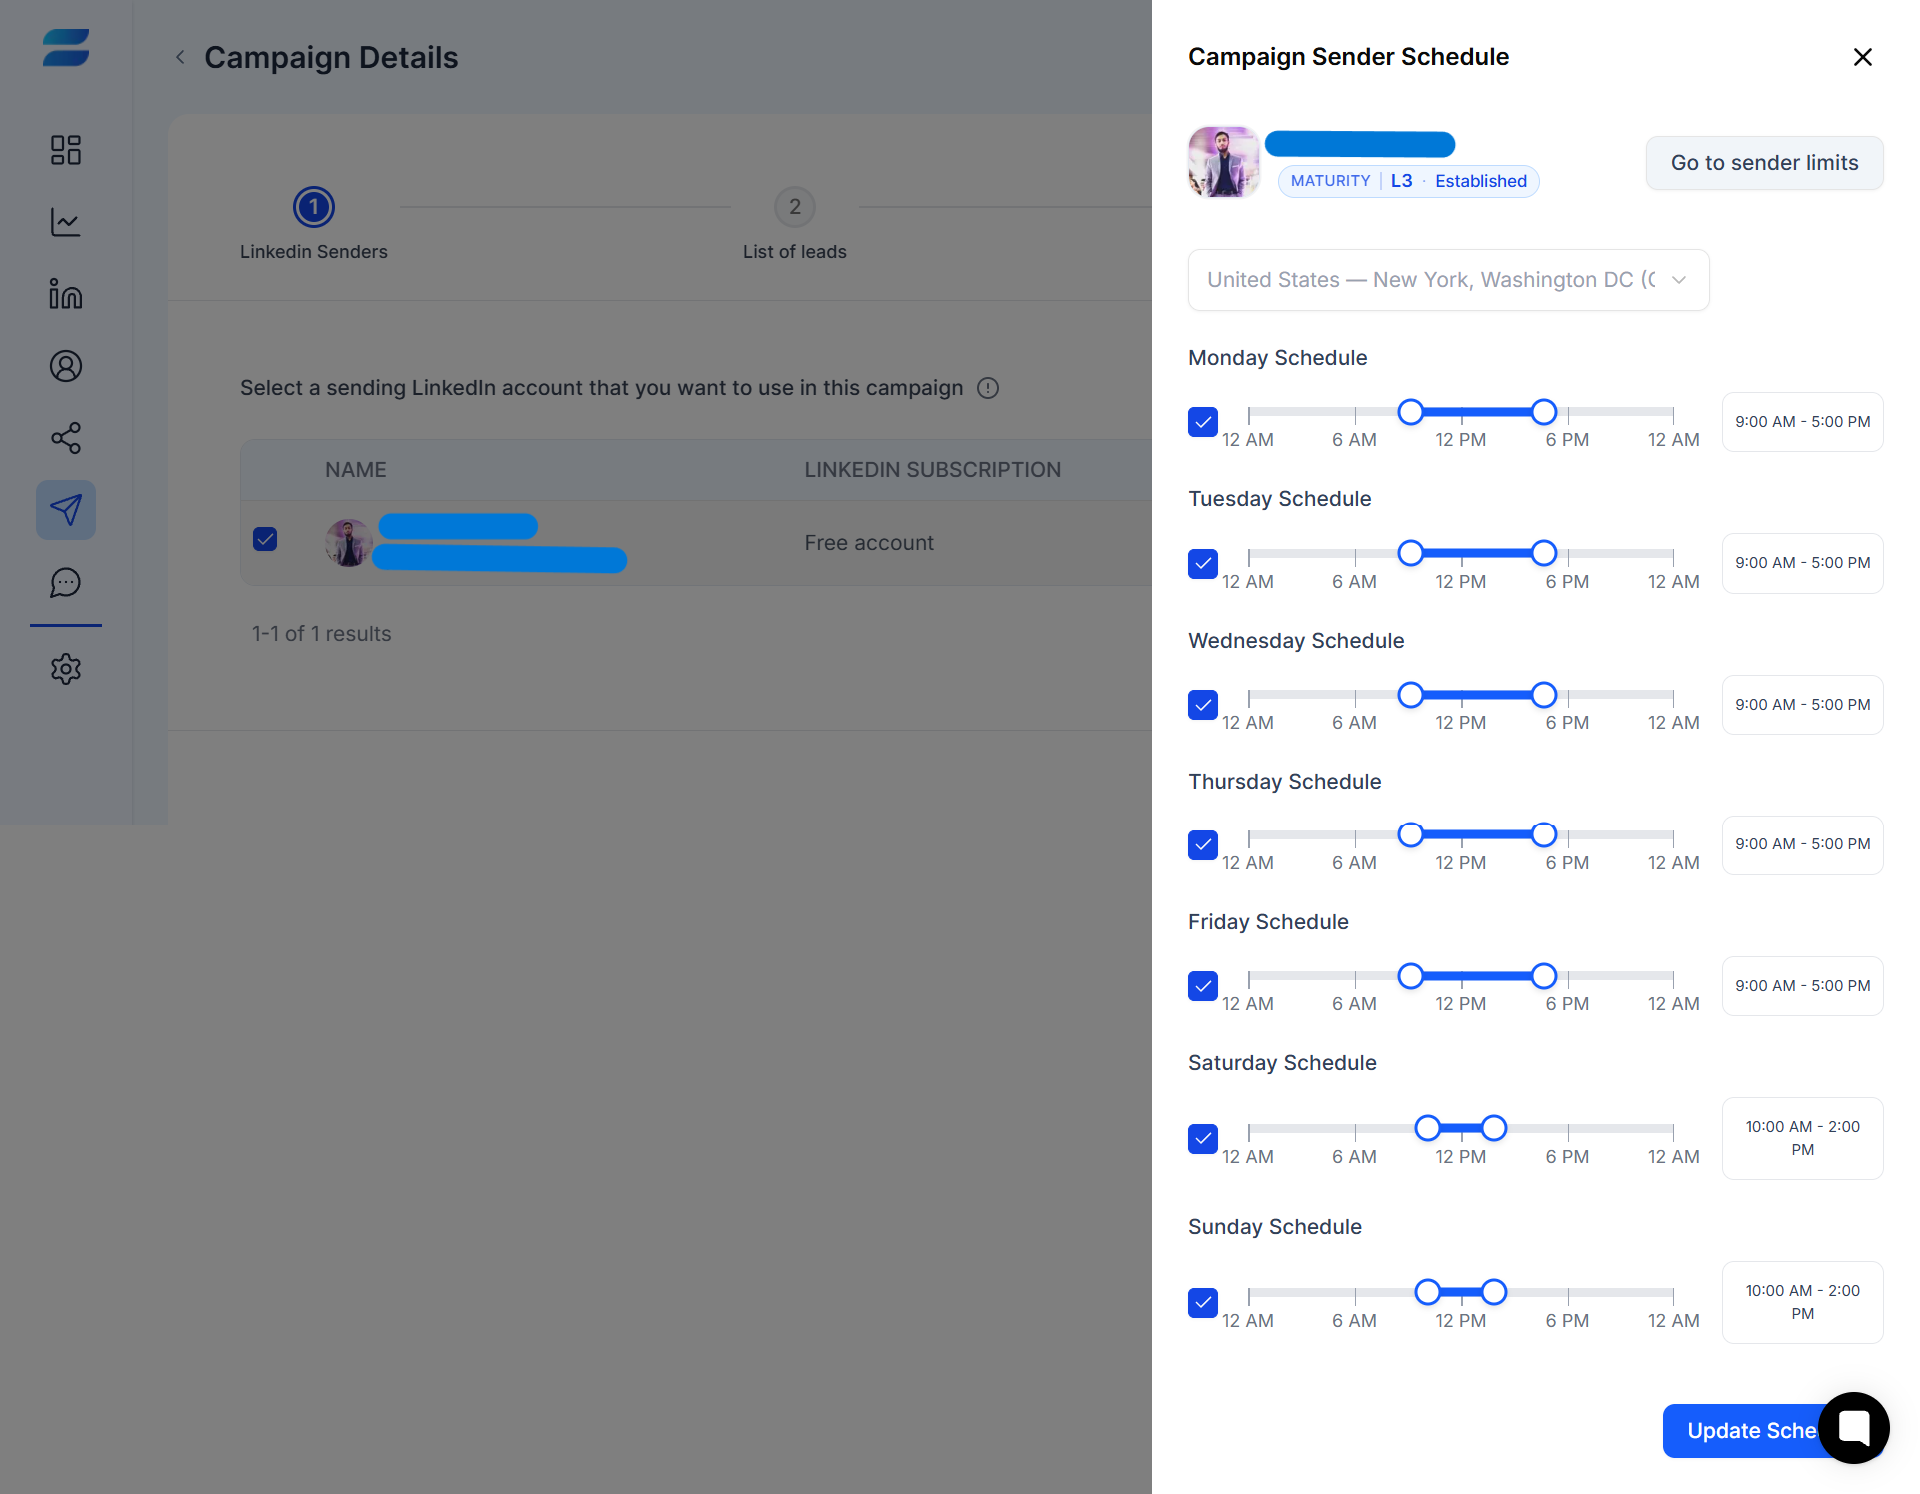
Click Save Settings or Update Schedule after making changes.
Next, choose the leads you want to reach.
Select the lead list from the Select exclusive list dropdown.
Review the number of leads available in the selected list.
Review the exclusion options before continuing.
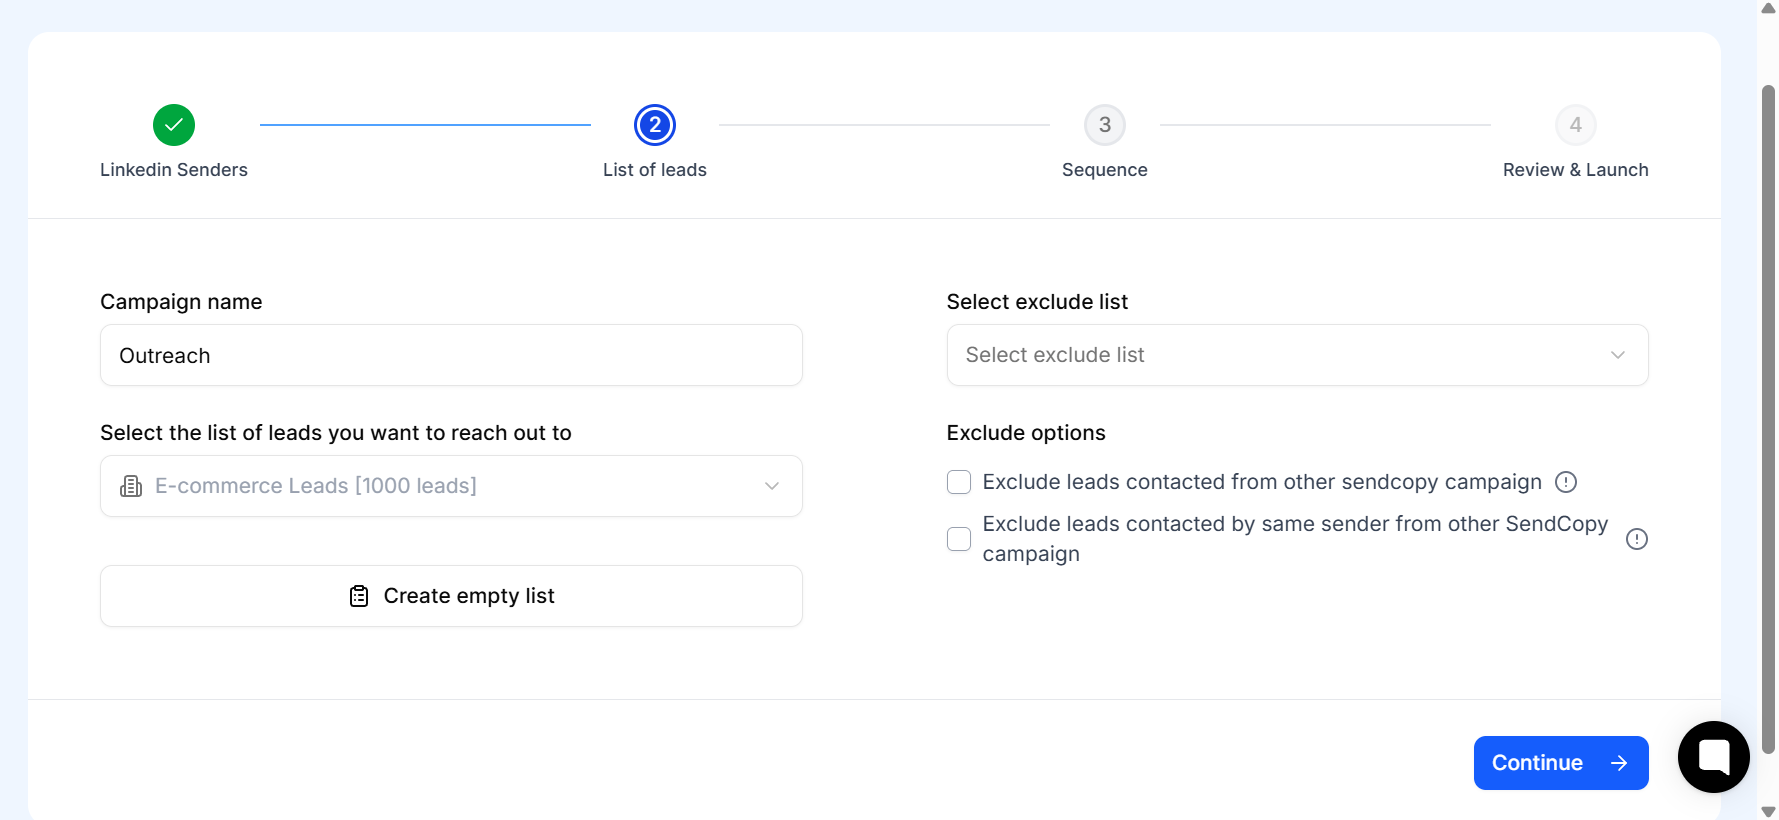
SendCopy allows you to exclude leads based on previous activity, including leads who have already been contacted through other SendCopy campaigns.
You can also create an empty list from this screen if needed.
Once your lead list and exclusions are configured, click Continue.
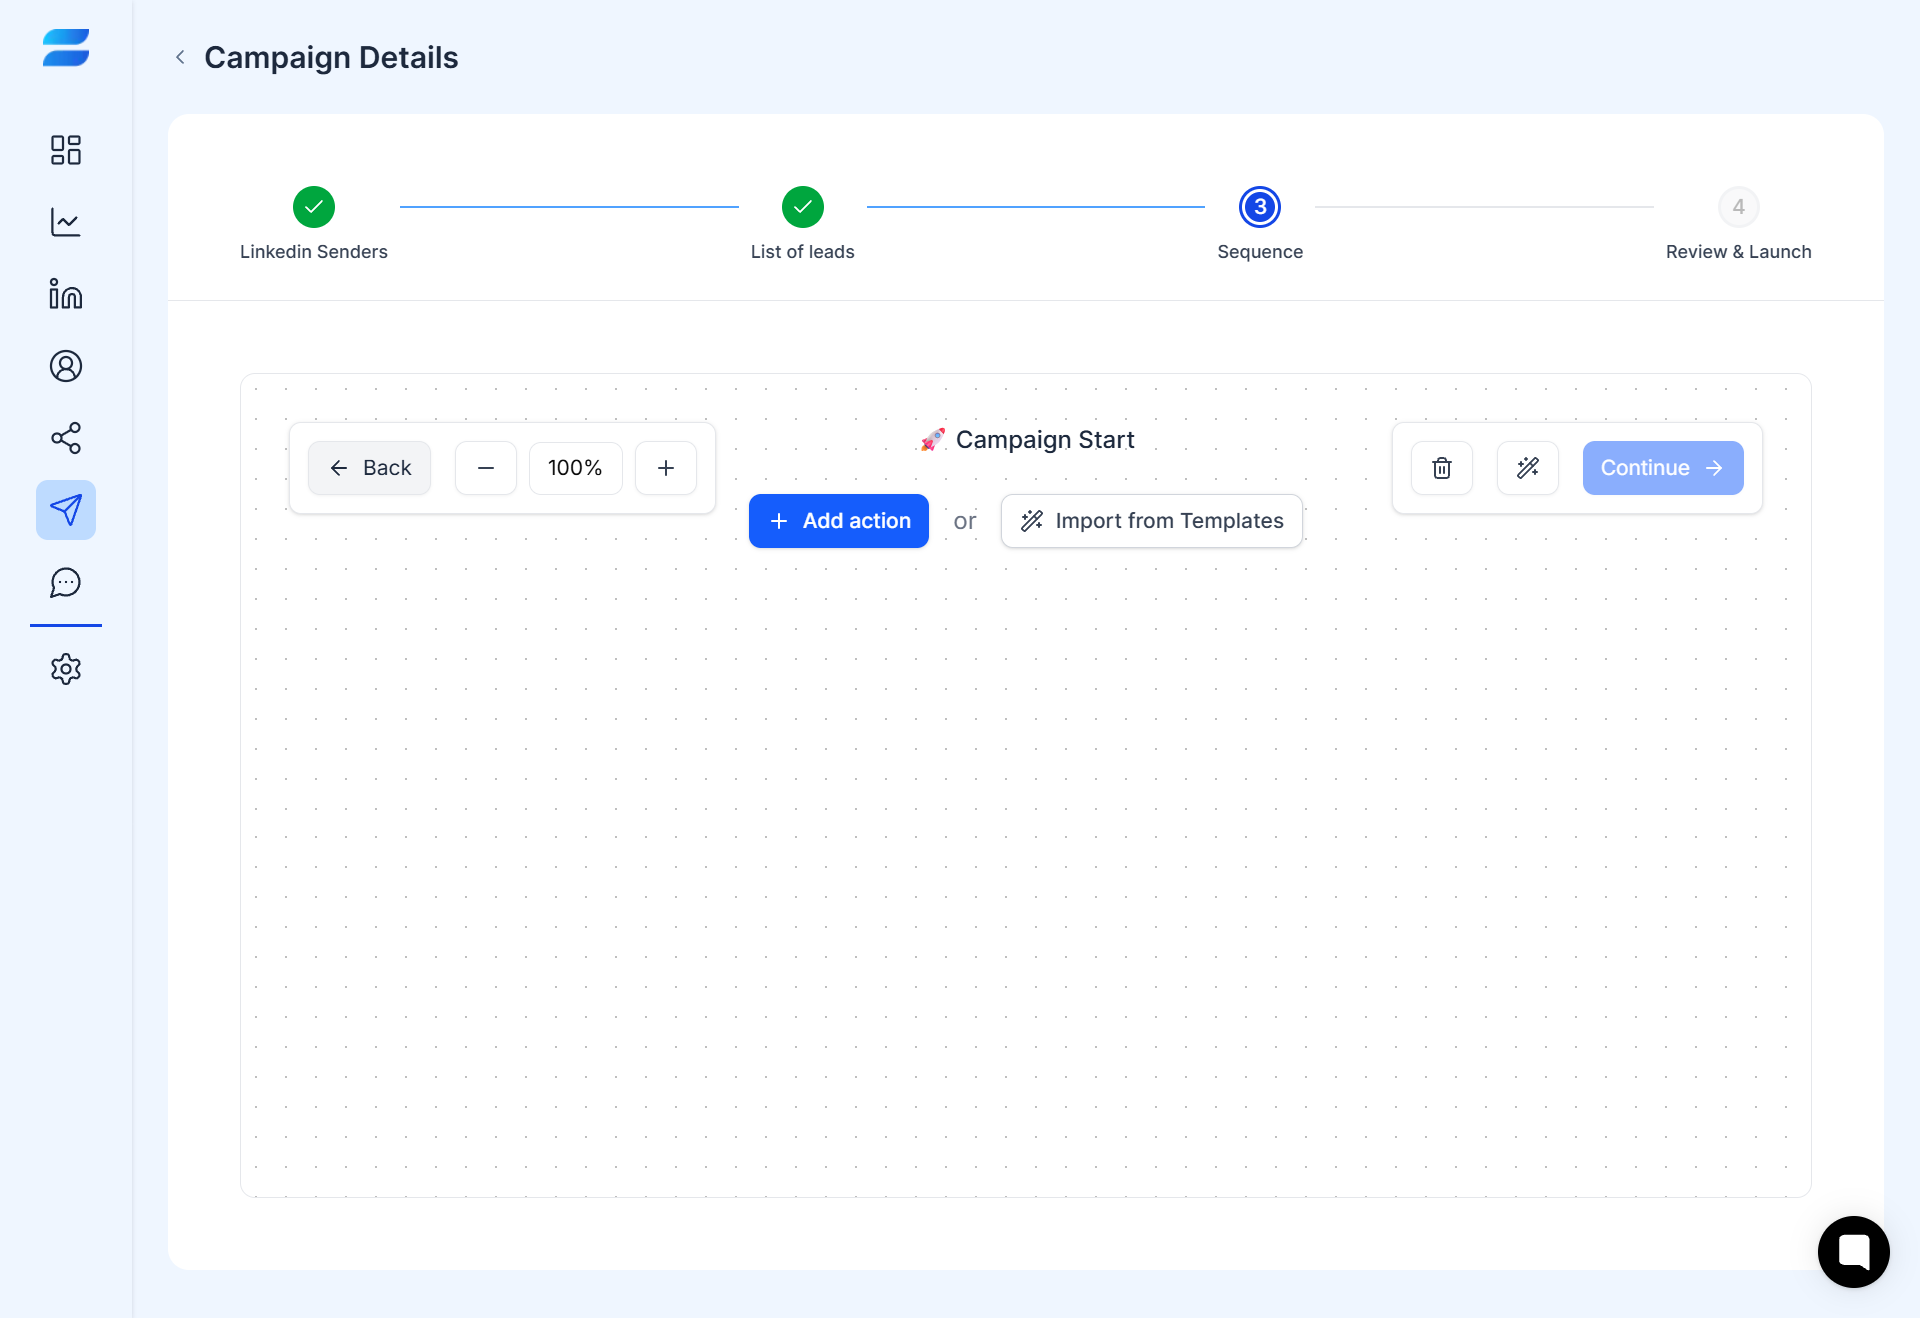
The Sequence step is where you define what SendCopy will do with your selected leads.
You can either build the campaign sequence yourself or start from an existing template.
Click Add Action to add an action to your campaign workflow.
Depending on your campaign setup, you can create a sequence of outreach actions and define how leads move through the campaign.
You can also select Import from Templates to choose from an existing sequence.
SendCopy provides templates for different outreach approaches, such as:
Engagement Response Sequence
Comment Follow-Up Sequence
New Connection Nurture
Value-First Outreach
Social Proof Sequence
Partnership Proposal
Expand Your Network
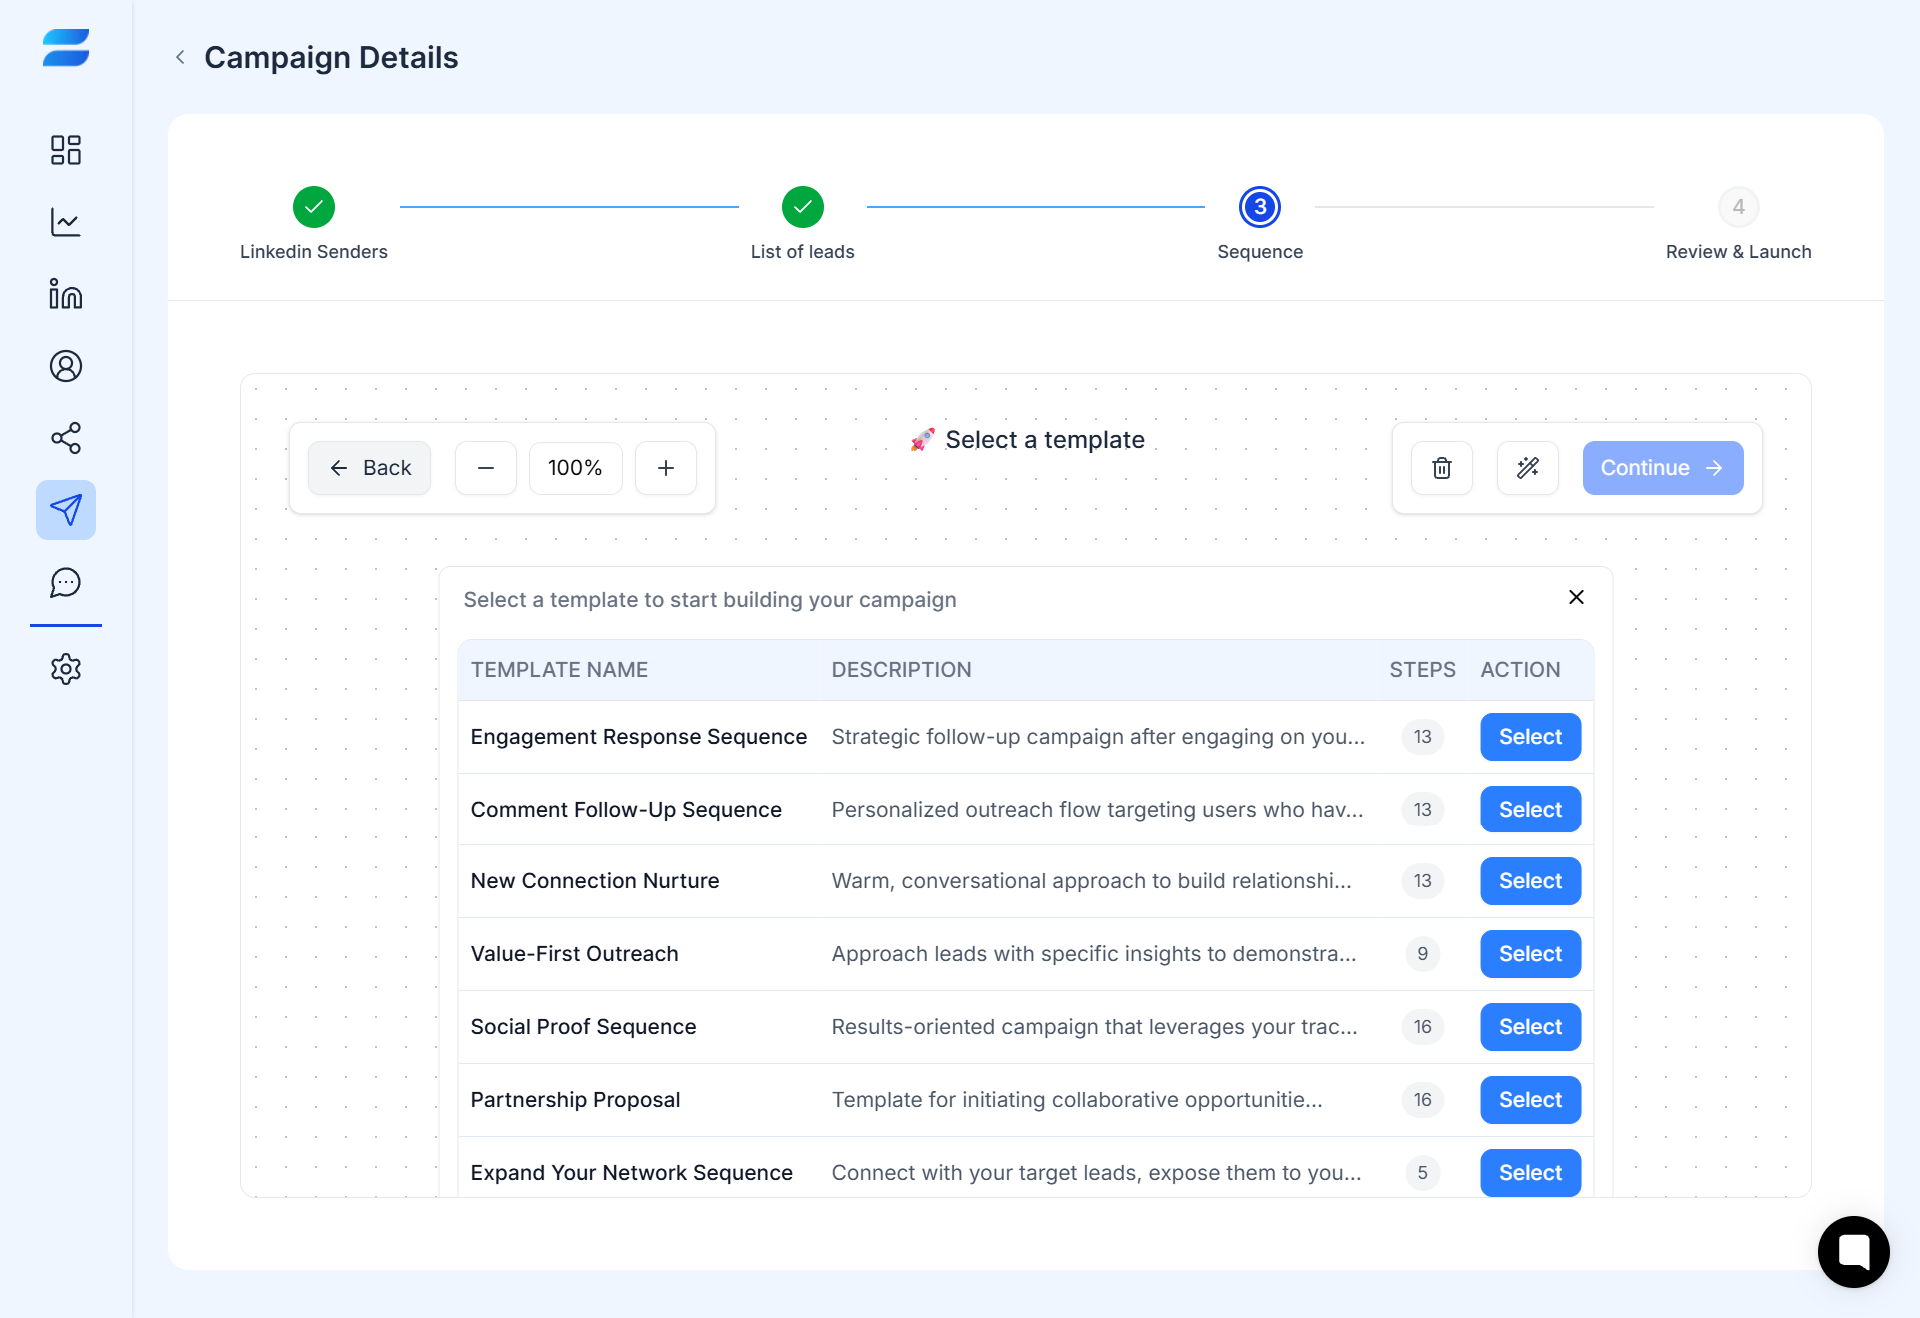
Select the template that best matches your campaign goal, then review and customize the sequence before continuing.
Tip: Always review the sequence as a prospect would experience it. Make sure the messages, actions, personalization, and timing are appropriate for your audience.
Before launching, review the complete campaign configuration.
Check:
LinkedIn Sender: Make sure the correct account is selected.
Lead List: Confirm that the intended leads are included.
Exclusions: Make sure unwanted or previously contacted leads are excluded where appropriate.
Sequence: Review every action and message.
Limits: Confirm the sender limits are appropriate.
Schedule: Check when campaign activity will run.
If everything looks correct, continue to launch the campaign.
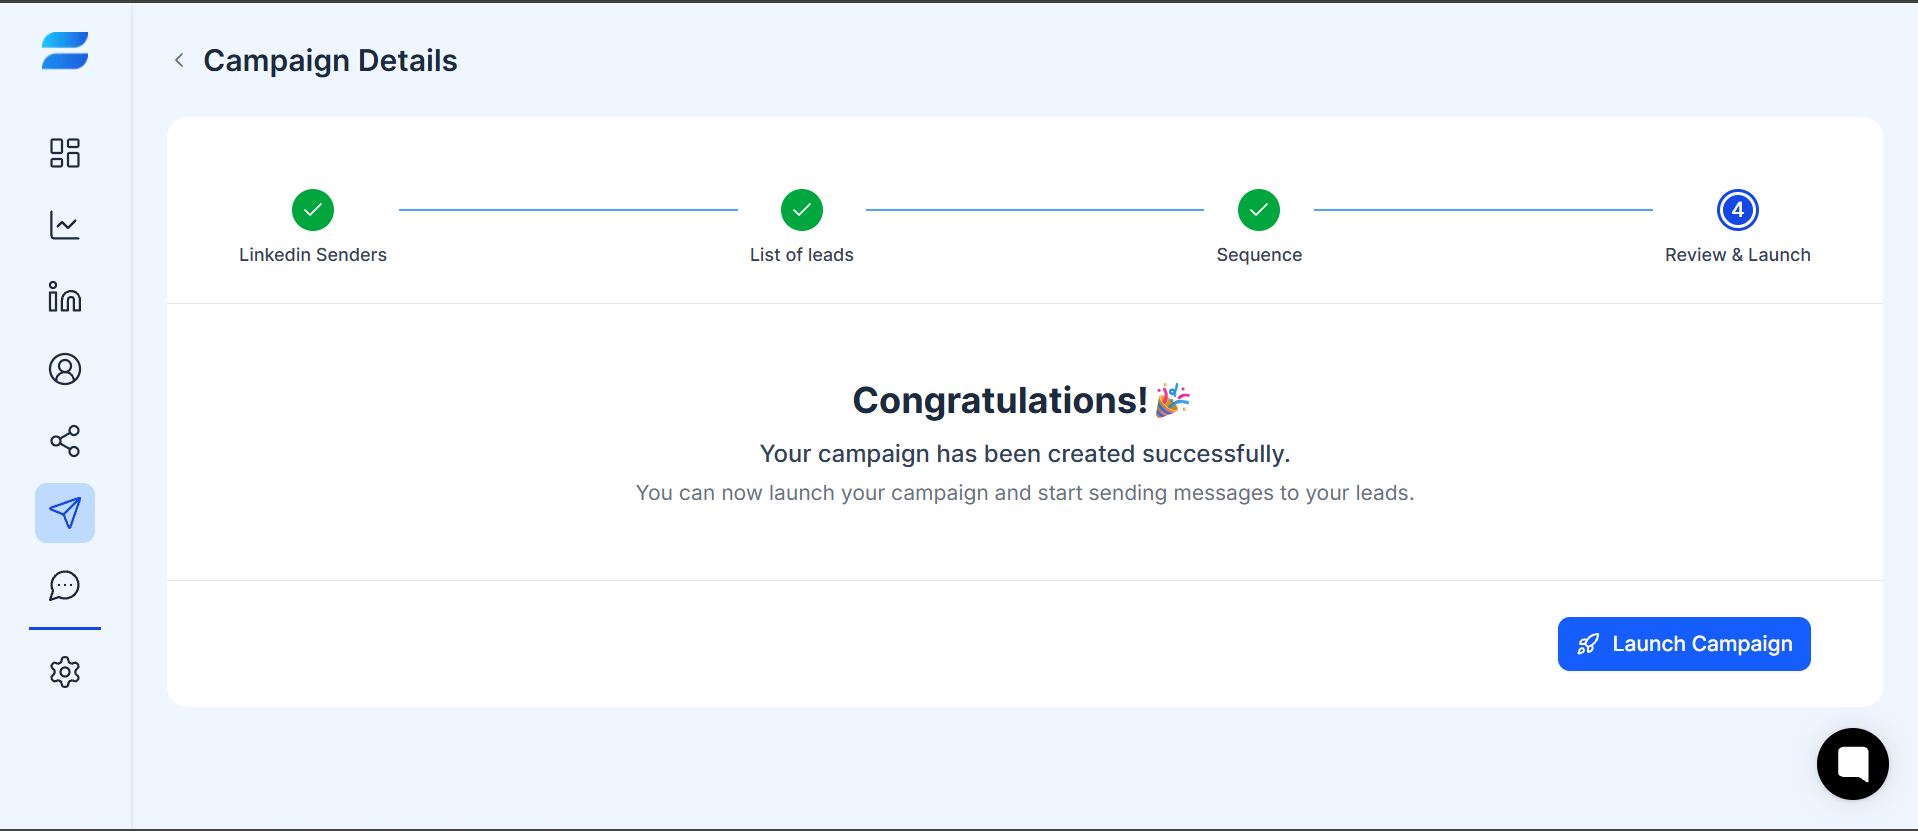
Once the campaign has been successfully configured, SendCopy will show a confirmation that your campaign has been created successfully.
Click Launch Campaign to start the campaign.
After launching, you can return to the Campaigns area to monitor your campaign and its activity.
After launch, regularly check your campaign to make sure everything is working as expected.
Monitor:
Campaign activity
Connection requests
Messages and follow-ups
Lead responses
Sender status
Campaign performance
You can also use Unibox to keep track of conversations and replies from your leads.
If you don't see campaign activity after launching, check the following first:
Confirm that the campaign has been launched.
Check that the selected LinkedIn sender is available.
Make sure the lead list contains available leads.
Review your sender limits.
Check the campaign schedule.
Confirm that the sequence contains active actions.
If the campaign still isn't sending after checking these settings, see Why Isn't My Campaign Sending? or contact Support.
For your first campaign, start with a manageable lead list and a simple sequence.
This makes it easier to review your messaging, verify that the campaign is configured correctly, and monitor activity before expanding your outreach.
Once you're comfortable with the workflow, you can create additional campaigns for different audiences, senders, or outreach strategies.
Building a Message Sequence: Connection Requests & Follow-Ups
Scheduling, Pausing & Resuming a Campaign
Unibox(Omnibox) Overview
Analytics Dashboard Overview
Why Isn't My Campaign Sending?